Author Archive

Creating easy custom buttons in Android

Wouldn’t it be cool if you could make your own buttons? Well, I’ve done a bunch of hax here and there where I use ImageViews for buttons and switching the image on press and such, and sure, that works. But it isn’t as clean, and well coded as this implementation here.

What this is going to involve is putting an XML layout in your drawables folder. I know, you’re scared. I was too at first. But now, I’m creating custom buttons like its going out of style (which it probably is).

The essence here is we are going to take the style of the original Android button, and override its image resources with our own, while leaving the rest of the functionality alone. Lets start with putting the images for the button you want to use.  This example just uses an up and a down state.

Just right click and save as for these images.  Copy them into your drawables folder.

Now, the magic happens.  Create a new file in your drawables folder and call it “new_button.xml”

Paste the following code into this file

<?xml version="1.0" encoding="utf-8"?>
<selector xmlns:android="http://schemas.android.com/apk/res/android">
<item
android:state_window_focused="false"
android:state_enabled="true"
android:drawable="@drawable/custom_button_up" />
<item
android:state_window_focused="false"
android:state_enabled="false"
android:drawable="@drawable/custom_button_up" />
<item
android:state_pressed="true"
android:drawable="@drawable/custom_button_down" />
<item
android:state_focused="true" android:state_enabled="true"
android:drawable="@drawable/custom_button_down" />
<item
android:state_enabled="true"
android:drawable="@drawable/custom_button_up" />
<item
android:state_focused="true"
android:drawable="@drawable/custom_button_up" />
<item
android:drawable="@drawable/custom_button_up" />
</selector>

Excellent. For now, we are just dealing with 2 states, pressed and unpressed. The variables you see above make it clear the different button states you could have if you wanted.

Now, we need to make a “styles.xml” file, this is where your program will look for styles that you have declared. Where do I put this styles.xml you wonder? In that folder you probably never use, the “values” folder. So, go to your values folder, and create a file called “styles.xml” and paste this code into it:

<?xml version="1.0" encoding="utf-8"?>
<resources>
<style name="NewButton.Button" parent="@android:style/Widget.Button">
<item name="android:background">@drawable/new_button</item>
</style>
</resources>

Excellent! Now you’re ready to use your custom buttons! In your main layout, or whereever you want to use this button, call this in the code

<Button
android:id="@+id/custombutton"
style="@style/NewButton.Button"
android:layout_width="wrap_content"
android:layout_height="wrap_content"
/>

If all goes well, this is what it should look like!

If you just skimmed to the bottom looking for source code, youre in luck. Download below.  Helpful?

http://www.inphamous.com/code/examples/Custom_Buttons.zip

Somthing extra…

Try this-  Since its still a button, you can add text on top of this bad boy.  Keep that in mind when designing your own custom buttons.  Someday, I will enlighten you on how button images properly stretch using the 9 patch tool.  Heres the guide from google if you don’t want to wait for me

http://developer.android.com/guide/developing/tools/draw9patch.html

-inph

Android Simple Progress Dialog implementation

Add a progress dialog very simply into your code.


private ProgressDialog mDialog;
mDialog = new ProgressDialog(this); // This being a context, could try getBaseContext() as well

Then, say you want it to show up on a button press. In the buttons listener, put this in (you can adjust the variable numbers later after it works)


mDialog.setProgressStyle(ProgressDialog.STYLE_HORIZONTAL);
mDialog.setMessage("Gathering Wireless Data...");
mDialog.show();
mDialog.setProgress(0);
mDialog.setMax(60);

Then, if used in conjunction with the thread example from below, put this in when you want to increase the progress bar


mDialog.incrementProgressBy(1);

And then finally, when you want it to go away,


mDialog.dismiss();

ez

Implementing a thread in Android

Here is a simple way to implement a thread into your program.  I usually use it when I want to scan something every few seconds or something.  The onStart and onStop will start and kill your thread.  The sendEmptyMessage is what you use in the thread to update your UI.   All of these methods will go below your onCreate(Bundle whatever) function.

You don’t have to call anything in the onCreate function to make it run.  In this example it will start running when the program starts, however you could call startScan() where ever you want

@Override
public void onStart(){
    startScan();
    super.onStart();
}

@Override
public void onStop(){
    isRunning = false;
    super.onStop();
}

public void startScan() {
    new Thread() {
        public void run() {
            while (isRunning) {
                try{
                    Thread.sleep(2000); // How long the thread will wait in milliseconds.  Not 100% accurate

                    if(!isRunning) {
                    break;
                    }
                    // Do stuff here
                    hRefresh.sendEmptyMessage(REFRESH SCREEN);
                }catch(Exception e){
                }
            }
        }
    }.start();
}

// Refresh handler, necessary for updating the UI in a/the thread
Handler hRefresh = new Handler(){
    public void handleMessage(Message msg) {
        switch(msg.what){
        case REFRESH_SCREEN:
        //Do stuff in here that you want updated in the screen
        break;
        default:
        break;
        }
    }
};

Find this helpful? Know a better way of implementing a simple thread? Please feel free to share. Do you need this code uploaded into a sample project? If there is a demand I can start creating basic empty projects that illustrate the code in action. Enjoy!

Wtf is a for each loop?

I only learned this a couple months ago. Its actually very simple. Why they didn’t teach this in school, I don’t know. Maybe its more of a java thing than a C++ thing. In any case, heres how you use it.

Simple example, lets add up all of the ints in this array. Normally I would use a regular for loop

int[] intArray = new int[10];
int total;
for (int i = 0; i < 10; i++){
total += intArray[i];
}

Instead, lets use a for each. Basically, this means “For each int in the intArray…”

for (int tmpInt : intArray){
total += tmpInt;
}

This work for everything, like Strings, or even objects. It is most commonly used in lists (from what I’ve seen)

ArrayList<String> stringList = new ArrayList<String>();
for (String tmpString : stringList){
// do something with the string
}

Have questions on wtf a for each loop is? Leave a comment, I’ll try to answer! Have a better explanation of a for each loop? Leave a comment. This is what I came up with off the top of my head. Chances are theres a better way of doing it.

Writing and Deleting on the SD card, simplified

This should be something easy and intuitive. The internet makes this not so. Here you go, functions for writing and deleting on the SD card. Copy and paste these right into your program. Do you want to clutter up your users SD card with unnecessary files? Do you want to delete all files on your users SD cards? Do so to your hearts content! (Please don’t though, its messed up.)

// Saving a file to the SD card
public void writeFile(String filename, String data){
try {
File root = Environment.getExternalStorageDirectory();
if (root.canWrite()){
// This stores the file on the SD card
File locDataForMachines = new File(root, filename + ".txt");
FileWriter machineWriter = new FileWriter(locDataForMachines, true);
BufferedWriter machineOut = new BufferedWriter(machineWriter);
machineOut.write(data);
machineOut.close();
}
} catch (Exception e) {
// Do whatever you gotta do, maybe use some other exceptions too
}
}
// Deleting a file from the SD card, probably used in conjunction with the function above
public void deleteSDFile(String filename){
File deleteMatchingFiles = new File("/sdcard");
try{
if (deleteMatchingFiles != null){
File[] filenames = deleteMatchingFiles.listFiles();
for (File tmpf : filenames){
if (tmpf.getName().startsWith(filename)){ // can change starts with to anything you want to compare with
tmpf.delete();
}
}
}
}catch(Exception e){
// Do whatever you gotta do, maybe use some other exceptions too
}
}

Also, add this to your manifest. I hate how people never remind you what to add to the manifest. Its like they want you to fail.


<uses-permission android:name=”android.permission.WRITE_EXTERNAL_STORAGE”>

Post below and let me know how bad you think this implementation is, or let me know how it helped you. Thanks!

addContentView example simplified

Welcome to inphamousdevelopment.com! You were probably directed here from my portfolio site, inphamous.com, or by some miracle you were looking for some android code on Google and you happened to stumble here. Basically this site is a way I’m contributing back to the internet by sharing the code I’ve created and found to help your android producing experience easier.

Today, for a first post, I will make a simple yet demanded contribution. First, let me type out all of the searches I made before I got close to my answer

addContentView help, addContentView Android, addContentView Code Android, Adding a xml layout onto a canvas android, how to inflate a view with an xml file, multiple layout xml android, etc, etc.

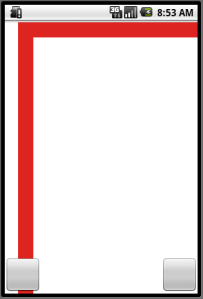
The list goes on, next time I will actually better document what I searched for, so that hopefully those same searches will direct you here! In any case, by reading those searches, maybe you can see what I wanted to do. I want to draw a couple of buttons from an xml layout onto a canvas. This solution will work with drawing any xml layout onto anything else however.

LayoutInflater inflater = getLayoutInflater();
View tmpView;
tmpView = inflater.inflate(R.layout.extra_layout, null);
getWindow().addContentView(tmpView, new ViewGroup.LayoutParams(ViewGroup.LayoutParams.FILL_PARENT,
ViewGroup.LayoutParams.FILL_PARENT));

Alternatively, if you want the code to be a little slimmer, just put the inflater return directly into the addcontent function, as so

LayoutInflater inflater = getLayoutInflater();
getWindow().addContentView(inflater.inflate(R.layout.extra_layout, null), new ViewGroup.LayoutParams(ViewGroup.LayoutParams.FILL_PARENT,
ViewGroup.LayoutParams.FILL_PARENT));

This code goes into your onCreate(Bundle whateever), preferably right underneath where you just called “setContentView(R.layout.main);”

If you found this helpful, leave a comment! I make no claim that this is the best implementation for this idea, but it works!

Buttons xml overlay


-Kevin Grant